|
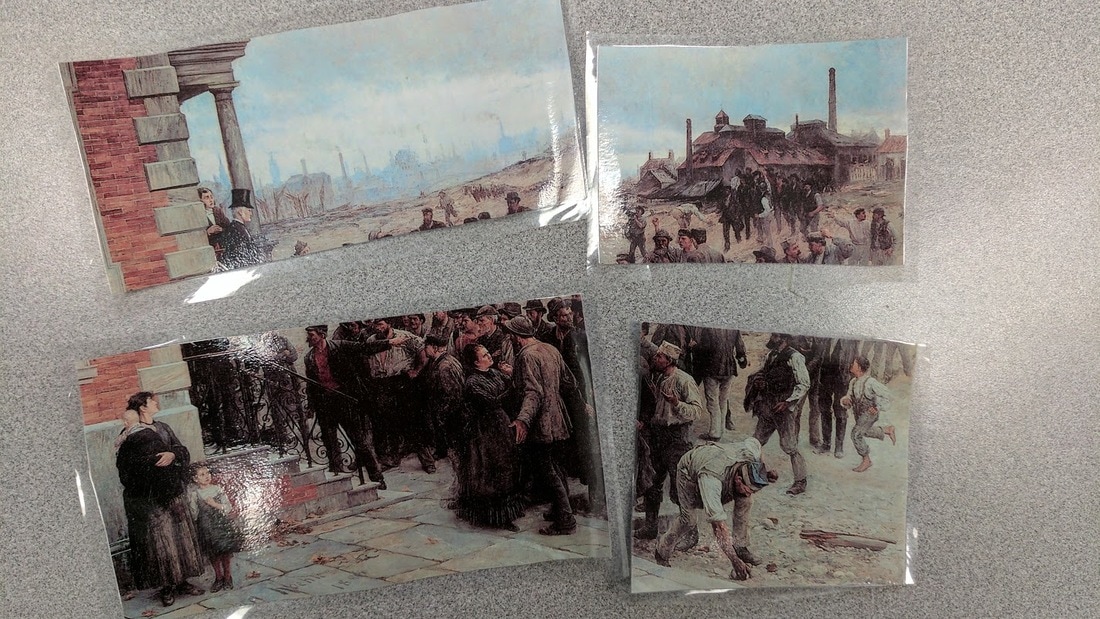
I have worked with social studies teachers for over 15 years and hands down, the most popular strategy I hear back from them are the tools for analyzing visual primary sources. And of those strategies, one "Divided Image" is the most requested of all. In essence it is a way in which teachers can divide an image while asking students to dive deep into analysis. Often, teachers think its only about the cutting up of the picture but as you look through this post please remember that it is REALLY about the questions you ask and how you drive them to keep get deeper with their analysis.
Most recently I was working with teachers at one of the schools here in Rocklin and some of them asked for me to share any tutorials. That is the purpose of the post; to put both the philosophies and "how to's" all in one place. Please reach out if you have any questions.
The two BIG TIPS when thinking about doing this strategy are these:
1) Make it about the questions? You should serve as someone who is just prompting them to think more and more. Below you will find a video tutorial and in this you will hear me talk about the Library of Congress' "Observe, Reflect and Question". Basically, you need to focus them on ONLY observing at first. They should dive DEEP and tell you all that they see. Then, and only then, can you have them move onto to making inferences. Finally, they should think about things which they still don't know. 2) To help dive deep into analysis I would print multiple copies of the image you are having them analyze, cut them into the same pieces and then laminate them. Then divide the class into small groups and each time you reveal a part of the image you will accompany this with passing out the corresponding laminated piece. You can see below what these look like laminated.
0 Comments
So, while I’m trapped in this silver tube flying at 30,000 feet, might as well try to reflect. Of all my Georgia stops, Clayton County seems to be the one which I’ve frequented the most and this most recent trip was for their Social Studies Summer Institute. First off, I would like to commend all their coordinators and teachers for putting social studies as such a priority in their district. From much of what I see in my district and beyond, social studies is being more and more marginalized as the conversations about ELA and Math test scores dominate. Side Note: turn on the Nightly News tonight and count how many stories are Social Studies & Science as opposed to Math and ELA. #justsaying As with every workshop and training I do, I embed the conversations with instructional technology ideas and strategies. These include tips for helping analyze primary sources, how teachers can empower their own learning by developing their own Personal Learning Network, and my favorite how they can design lessons where students CREATE instead of just CONSUME. These include creating documentaries, digital magazines, and green screen historical flashbacks. Probably my biggest take away was actually getting the opportunity to talk and share with teachers whom I’ve already worked with. In my three days of workshops I had roughly 1/3 of the teachers in my sessions who had already seen me present before. Instead of saying “oh crap, I hope I don’t bore you with some of the same stuff you’ve seen before”, I took the opportunity to listen to them and hear about their experiences. Here are some of the examples of which teachers shared back with me about how they tried some new ideas: “I started using the SOAPSTone strategy with my government students for virtually all of our primary sources” “I created a Twitter account after you were here last time and I’ve found many ideas and inspiration from people I follow and from hashtag #sschat” “I never tried a Gallery Walk before (having students walk around the room and analyze images and other primary sources, similar to Carousel Brainstorming activity) but it was great getting the students out of their seats and interacting with each other and the content” I even heard from another teacher who was leading a session on review strategies and he said “I’m showing everyone your Frazzle game, and we having such a fun time” Oh… I have to share a non-education moment. On my second day some of the teachers said, you should check out the Civil Rights museum in downtown Atlanta. This sounded fantastic, but after looking up the times I might not have been able to make it before it closed. And then another teacher said, “you could check out the town where they filmed the Woodbury scenes for Walking Dead”? SCREEEEECCHHHH {That’s the sound of my rental car tires leaving the training to get myself 40 minutes south to Senoia, GA!, But now let’s be clear I did not CHOOSE Walking Dead tourism over going to the Civil Rights museum, that would be bad…. I just didn’t have enough time!} Senoia was super cool! It looked just like it did in the show where that Crazy ole’ Governor ran the town. Sorry for those of you who haven’t seen it, but Wow…I was in super zombie fandom. Plus there was a Walking Dead Café and gift shop. I bought a poster and then walked to the end of the town where other super zombie fans had set up because, guess what, the show is again filming there! I stuck around for awhile but only got to see the other crazy fans and one passing glimpse of the actress who plays Tara (we think) on her way to film a scene. IN every training or workshop one does you will always get something back in return. One of my favorite takeaways was a new idea on how to analyze visuals. We were discussing various Visual Literacy skills and one teacher simply said, "how about if kids drew what they thought was happening"? I loved this idea and in fact I'm adding it to my list for a future blog post about ways to teach Visual Literacy. Coming soon (except I have like 8 other blog posts drafts just needing to get finished; well, at least I got this one done!)
OK… my 70’s Easy Listening playlist is almost done and I think I accomplished my goal of reflecting on these three days. This least week I helped out a history teacher friend of mine named April who was having her end of the year history class celebration. She was inspired to do a History Dinner Party lesson from a teacher Facebook Group. Here is part of this lesson Along with researching and interacting with each other, the students were asked to dress up in character to add to the experience. I offered to add a little to this lesson by setting up a green screen and having the students get their photos taken. So, they were asked to do a little more research and to provide a image to use as their background. We set up a Google Drive folder and the students were responsible to add their image to the folder.
These are some of the finished images.
Several years ago I stumbled upon some historical images that people recreated using Legos. I would share these with my students when we got to these periods in history, but thought recently, "this could be a good lesson for an entire class".
Before I get into this lesson idea here are some of my favorite images I compiled. Along with the Lego imag, I added the real image on the next slide plus an interesting link to follow up about the event or the image itself.
To be clear though, these are NOT my pictures. Here are links to the incredible galleries and people who made many of these:
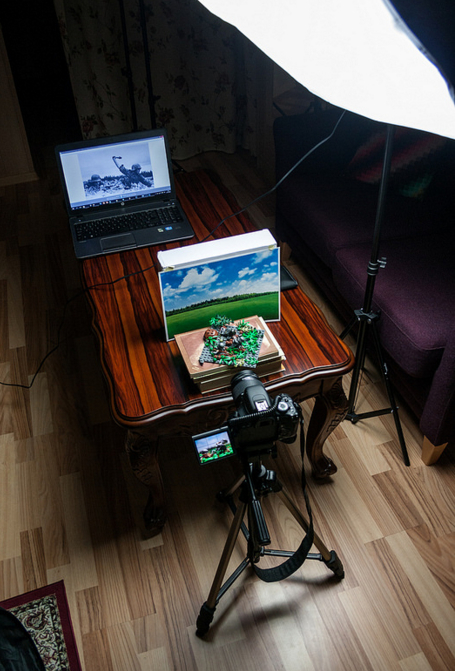
Plus check out this site called "Rare Historical Photos: And the story behind them…" I used this to do research on some of these photos and learned so much more from just digging around.. You can also follow them on Twitter here. Now making these recreations isn't as simple as finding the right Legos. You have to think about lighting, backgrounds, and focus. For example, check out some of the setup required by making one of these images:
So, can I do something like this in my classroom?
Sure! Here is what I would do.
Good luck and please share back if you use this at all. |
Recent Posts
All
|


 RSS Feed
